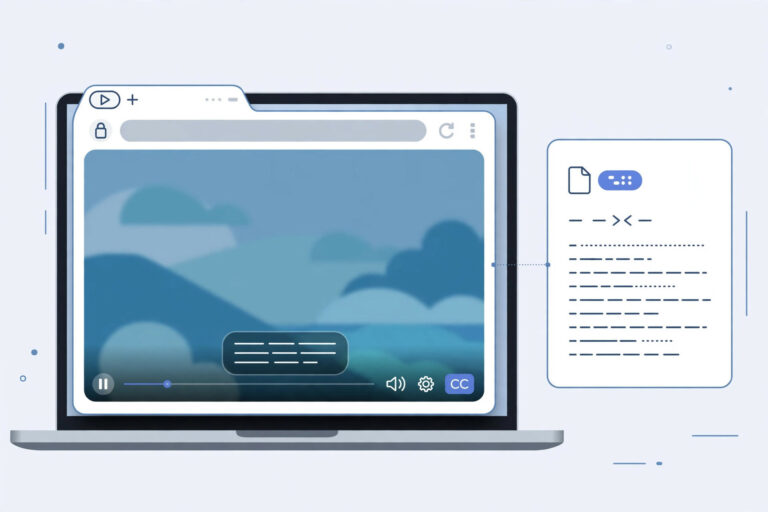
If you stream on Twitch or YouTube with OBS Studio, adding live closed captions makes your stream accessible to deaf and hard-of-hearing viewers, helps non-native speakers follow along, and even helps anyone watching with the sound off. The free OBS closed captions plugin does this with on-device speech recognition — no paid captioning service required.
The catch: the plugin’s documentation is mostly written for developers, scattered across GitHub READMEs. This guide explains the whole setup in plain English — what the plugin does, how to install it, how to configure it, and how to test that your captions are actually reaching your viewers.
What the Plugin Actually Does
The OBS closed captions plugin (the well-known community plugin for OBS Studio) listens to your microphone audio inside OBS, runs speech recognition on it, and outputs the text as closed captions embedded in your stream. On Twitch and YouTube, viewers can turn these captions on or off with the CC button on the video player — just like captions on any other video.
A few things to understand before you start:
- Captions come from your mic audio. The plugin transcribes what OBS hears from your microphone source. Game audio, music, and Discord chat won’t be captioned — only what goes through the mic input you configure.
- Recognition happens on your computer. The plugin uses a local speech recognition engine, so your audio isn’t sent to a cloud service for captioning. The trade-off is that it uses some of your CPU.
- It’s live, so it’s imperfect. Live captioning will mishear words, especially names, slang, and game terminology. That’s normal for all live captioning — the goal is accessibility, not perfection.
- Viewers control it. Captions are embedded as standard closed-caption data. Viewers who want them turn them on; everyone else never sees them.
Before You Start: What You Need
- OBS Studio installed (a recent version — check the plugin’s release page for the OBS versions it supports, since plugin compatibility follows OBS updates).
- Windows, macOS, or Linux — the plugin supports all three, though installation steps differ slightly by platform.
- A working microphone in OBS. If your mic works in OBS already, you’re set. If not, get that working first — the plugin can only caption audio OBS can hear.
- A Twitch or YouTube stream to send captions to. The plugin embeds captions into the stream output, so you need somewhere to stream.
One important note: plugin versions are tied to OBS versions. When OBS releases a major update, the plugin may need an update too. If captions suddenly stop working after an OBS update, check the plugin’s releases page first — this is the most common cause.
Step 1: Download the Plugin
- Go to the plugin’s GitHub releases page (search “OBS closed captions plugin” — the established community plugin is the one with the most stars and recent releases).
- Download the installer or archive for your operating system. There are usually separate builds for Windows, macOS, and Linux.
- If there’s a choice between versions, pick the one marked as matching your OBS version. When in doubt, the latest stable release is the right choice.
A word on safety: only download from the plugin’s official GitHub releases page. OBS plugins run inside OBS with full access to your system — don’t install builds from random re-uploads or Discord links.
Step 2: Install It
On Windows:
- Close OBS Studio completely.
- Run the installer, or if you downloaded a ZIP, extract it.
- The plugin files need to go into your OBS installation folder — typically
C:\Program Files\obs-studio\. The archive contains folders likeobs-pluginsanddata; copy these into the OBS folder so they merge with the existing folders of the same name. (If you used the installer, it handles this for you.) - Start OBS. If the installation worked, you’ll find the plugin’s settings under Tools in the OBS menu bar.
On macOS:
- Close OBS Studio.
- Open the downloaded package and follow the installer prompts, which place the plugin in the OBS application bundle.
- Start OBS and check the Tools menu for the plugin’s entry.
On Linux:
- Close OBS Studio.
- Extract the archive and copy the plugin files into your OBS installation’s plugin directories (the README on the GitHub page gives the exact paths for common distributions).
- Start OBS and check the Tools menu.
If the plugin doesn’t appear in the Tools menu after installing, the usual culprits are: OBS was still running during installation, the files went into the wrong folder, or the plugin version doesn’t match your OBS version. Re-check each in order.
Step 3: Configure the Plugin (In Plain English)
Open the plugin’s settings from the Tools menu. Here’s what the important options mean:
Caption source (audio input). This tells the plugin which audio to transcribe. In most setups, you want your microphone — not your desktop audio. If you select desktop audio, it’ll try to caption game sounds and music, which produces garbage. Choose the mic source you actually speak into.
Language. Set this to the language you stream in. The speech recognition engine supports many languages, but it needs to know which one to expect. Streaming in English with the language set to something else is a common misconfiguration.
Recognition engine / model. The plugin may offer a choice of recognition backends or model sizes. Larger models are more accurate but use more CPU; smaller ones are faster but sloppier. Start with the default — it’s the balanced choice — and only change it if you have a specific problem (captions lagging = try a smaller model; too many errors = try a larger one if your CPU can handle it).
Caption delay / buffering. Live captioning has inherent latency — the plugin needs to hear a phrase before it can caption it. A small buffer smooths out the output. Don’t set this to zero chasing zero latency; a second or two of delay produces much more readable captions.
Output format. The plugin embeds captions in the standard format your streaming platform expects (Twitch and YouTube both accept embedded CEA-608/708 captions). You generally don’t need to change this — the defaults are correct for both platforms.
Preview. Most versions of the plugin show a preview window of what it’s hearing and captioning. Keep this visible while you configure — it’s the fastest way to see whether the plugin is working.
Step 4: Test Your Captions
Don’t go live to a real audience with untested captions. Test in this order:
- Check the preview. Talk into your mic and watch the plugin’s preview window. You should see your words appear within a couple of seconds. If nothing appears, the plugin isn’t hearing your mic — re-check the caption source setting.
- Do a private test stream. Twitch and YouTube both let you stream privately or unlisted. Start a test stream, talk for a few minutes, then watch the playback with captions turned on (the CC button in the player).
- Check caption timing. Captions should lag your speech by roughly 2–5 seconds. Much more than that, and viewers will find them distracting rather than helpful — try a smaller recognition model or reduce buffering.
- Check a noisy segment. Talk the way you actually stream — excited, fast, overlapping with game audio. This is the realistic test. Expect errors on names and slang; worry only if ordinary sentences are coming out wrong.
- Ask a viewer. Once you’re live for real, ask chat whether the captions are working. Viewers who rely on captions will tell you quickly if something’s off.
Troubleshooting Common Problems
| Problem | Likely cause | Fix |
|---|---|---|
| No captions in preview | Wrong audio source selected | Set caption source to your microphone, not desktop audio |
| Plugin missing from Tools menu | Installed while OBS was open, or version mismatch | Close OBS, reinstall, verify plugin version matches OBS version |
| Captions lag badly | Model too large for your CPU | Switch to a smaller/faster recognition model |
| Gibberish captions | Captioning desktop/game audio | Change source to mic only; check mic isn’t picking up speakers |
| Captions worked, then stopped after OBS update | Plugin/OBS version mismatch | Check the plugin’s releases page for an updated build |
| High CPU usage | Large recognition model | Use a smaller model; close other heavy apps while streaming |
Mic picking up your speakers deserves special emphasis: if your microphone hears your game audio through your speakers, the plugin will try to caption it, producing nonsense captions over your speech. A headset eliminates this completely.
Tips for Better Live Captions
- Speak clearly and at a steady pace. You don’t need broadcast diction — just avoid mumbling into your chest mic during intense gameplay moments.
- Use a decent microphone. The plugin can only caption what it can hear. A $30 USB mic close to your mouth beats a laptop mic across the room by a mile.
- Reduce background noise. OBS’s built-in noise suppression filter (right-click your mic source → Filters → Noise Suppression) helps the plugin enormously. Apply it to the mic the plugin listens to.
- Teach it your vocabulary. Some plugin versions let you add custom words — your username, game terms, community slang. If yours does, spend ten minutes on this; it fixes the most embarrassing mishears.
- Keep the preview visible. Glance at it occasionally during streams. If captions freeze or go wrong, you’ll catch it early.
Frequently Asked Questions
Is the OBS closed captions plugin really free?
Yes. It’s a free, open-source community plugin. There are paid live-captioning services with more features, but the plugin itself costs nothing and has no usage limits.
Do viewers need to install anything to see my captions?
No. Captions are embedded in the stream as standard closed-caption data. Viewers just click the CC button in the Twitch or YouTube player. Viewers who don’t want captions never see them.
Will captions work if I stream to Twitch and YouTube at the same time?
Both platforms accept embedded captions, so yes — as long as your multistreaming setup passes the caption data through to each platform. Test each destination separately the first time.
How much CPU does live captioning use?
It depends on the recognition model size and your CPU. With the default settings on a modern computer, it’s modest — but if you’re already pushing your CPU with a demanding game and encoding, monitor your usage during a test stream. Drop to a smaller model if you see performance issues.
Can the plugin caption my Discord friends or game chat?
Only if their audio goes through the mic source the plugin is listening to — which it shouldn’t, since that would also caption your game audio as gibberish. The plugin captions one audio source well. Captioning multiple remote voices accurately is beyond what it does.
What do I do when OBS updates and captions break?
Check the plugin’s GitHub releases page for a new build matching the OBS version. This is the most common post-update issue with all OBS plugins, not just this one. Consider waiting a few days after major OBS updates before upgrading, to give plugin developers time to catch up.
Conclusion
Adding closed captions to your OBS stream is one of the highest-value accessibility upgrades you can make, and the free plugin gets you there without a subscription. Install it from the official releases page, point it at your microphone (not your desktop audio), set your language, and test with a private stream before going live. Keep the preview window visible and use noise suppression on your mic. Your deaf and hard-of-hearing viewers — and everyone watching with the sound off — will thank you.
Related guides
- Video to VTT subtitles converter — create caption files for your streams
- Fix subtitles not working when streaming — troubleshooting guide
- How transcripts and captions boost SEO — make video content searchable
- Captions and transcripts for accessibility — reach every viewer