Direct answer: The quick version: how to add Closed Captions to Your Twitch Stream is easier than most people expect once you know the key facts. Details below.
Key takeaways:
- How Twitch Captions Actually Work: Twitch supports closed captions embedded directly in the stream signal (the same CEA-608/708 caption format used in broadcast TV).
- Method 1: OBS’s Built-in Captioning (Fastest Setup): Recent versions of OBS Studio ship with an experimental captioning feature that uses speech recognition to generate captions from your audio.
- Method 2: The Free OBS Captions Plugin (Best Quality Closed Captions): The community-maintained OBS closed captions plugin (by ratwithacompiler, free on GitHub) uses Google’s speech recognition to generate captions and embeds them as true CEA-608/708
- Method 3: Browser-Based Open Captions (No Plugin Install): If you don’t want to install a plugin, or you stream to multiple platforms and want visible captions everywhere, you can run captions through
- The right choice depends on your volume: occasional use favors free tiers, heavy use favors paid plans.
Many Twitch viewers watch with the sound off, on the train, at work, or late at night. Others rely on captions because they are deaf or hard of hearing, or because English isn’t their first language. Adding closed captions is one of the highest-impact free upgrades a streamer can make. The good news: Twitch natively understands embedded captions, so once your broadcasting software sends them, viewers get a standard CC button they can toggle on or off.
[ez-toc]
This guide covers the three practical ways to add closed captions to a Twitch stream in 2026: OBS’s built-in captioning, a free OBS plugin that embeds true closed captions, and a browser-based overlay method. All of them are free, and none of them require your viewers to install anything.
How Twitch Captions Actually Work
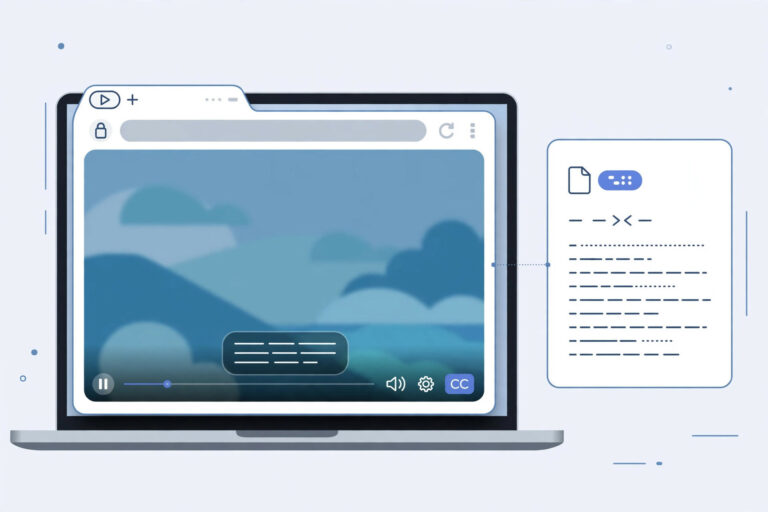
Twitch supports closed captions embedded directly in the stream signal (the same CEA-608/708 caption format used in broadcast TV). When your streaming software embeds these captions into the RTMP feed, Twitch’s player detects them and shows a CC button in the video controls. Viewers can turn captions on or off themselves, nothing is burned into the video, and nothing shows up for people who don’t want it.
This is an important distinction:
- Closed captions are toggleable data inside the stream. Viewers choose. This is what you want.
- Open captions are text burned onto the video itself. Everyone sees them, always.
The methods below mostly produce real closed captions. Method 3 produces open captions (an overlay), which is useful as a fallback for platforms or situations where embedded captions don’t render.
Method 1: OBS’s Built-in Captioning (Fastest Setup)
Recent versions of OBS Studio ship with an experimental captioning feature that uses speech recognition to generate captions from your audio. It takes about a minute to turn on.
- Open OBS Studio (update to the latest version first).
- In the top toolbar, click Tools.
- Choose Captions (Experimental).
- In the window that appears, make sure captioning is enabled for your stream output.
- Select the correct audio source, ideally your microphone-only source, so game audio and music don’t confuse the speech recognition.
- Go live. Captions are generated in real time and sent with your stream.
A few honest caveats: this feature is still labeled experimental, which means stability and accuracy can vary between OBS releases. Speech recognition quality depends heavily on your microphone and how clearly you speak. On Windows it generally works out of the box; macOS and Linux users may find the plugin route (Method 2) more reliable. That said, for a zero-install, zero-cost start, this is the path of least resistance.
Method 2: The Free OBS Captions Plugin (Best Quality Closed Captions)
The community-maintained OBS closed captions plugin (by ratwithacompiler, free on GitHub) uses Google’s speech recognition to generate captions and embeds them as true CEA-608/708 closed captions in your stream. Twitch picks these up natively, the CC button appears in the player on PC, Android, and iOS, and captions even persist in VODs. No Twitch extension or extra website is required.
Installing the plugin
- Close OBS completely.
- Download the latest
Closed_Captions_Plugin.zipfor your operating system from the plugin’s GitHub releases page. - Extract the zip. Inside you’ll find a folder named
obs-plugins. - Open your OBS installation folder (on Windows, usually
C:\Program Files\obs-studio\). - Copy the extracted
obs-pluginsfolder into the OBS folder, merging with the existingobs-pluginsfolder it already contains. Confirm the overwrite prompts, this only adds files. - Start OBS. You should now see Cloud Closed Captions at the bottom of the Tools menu.
Configuring it
- Go to Tools > Cloud Closed Captions. A Captions Preview window appears.
- Click Settings in that window and choose your caption source, the OBS audio source that contains only your microphone gives the best results.
- Set the preview to 3 lines (the plugin’s documentation notes that 4 lines can flicker on Twitch), with no forced line breaks.
- Optionally enable saving caption transcripts, the plugin can save your captions as an SRT subtitle file on your PC, handy if you later edit highlights for YouTube.
That’s it. When you go live and speak, captions flow to Twitch, and viewers see the CC button. Because the captions only trigger when your selected audio source is unmuted and active in the current scene, you won’t accidentally caption your desktop audio when your mic is muted.
How your viewers turn captions on
Make sure your audience knows the option exists, many viewers never notice the CC button. Tell them:
- On PC: click the CC button at the bottom right of the Twitch player.
- On iOS: it’s a system-wide setting, Settings > General > Accessibility > Subtitles & Captioning, then enable Closed Captions.
- On Android: open the player settings during the stream and choose Closed Captions, just below the quality options. The option appears once you’ve spoken on stream.
Method 3: Browser-Based Open Captions (No Plugin Install)
If you don’t want to install a plugin, or you stream to multiple platforms and want visible captions everywhere, you can run captions through a free browser tool like WebCaptioner and bring them into OBS as a source.
- Open WebCaptioner (free, runs in the browser) and start captioning. It listens to your microphone and displays live text.
- In OBS, click the + in the Sources panel and add a Browser Source (or Window Capture of the captioner window).
- Position and resize the caption text at the bottom of your scene.
- Go live. Your viewers see captions as part of the video image.
These are open captions, baked into the picture, not toggleable. That’s a drawback for viewers who’d rather not see them, but an advantage on platforms without native caption support, and you can see exactly what viewers see while you stream. An alternative within this method: connect WebCaptioner to OBS through the OBS WebSocket, which lets the captioner send text to OBS more cleanly, check the captioner’s channel settings for the current steps.
Which Method Should You Choose?
| Method | Cost | Caption type | Viewer control | Best for |
|---|---|---|---|---|
| OBS built-in (Tools > Captions) | Free | Closed captions | CC toggle | Fastest setup, testing the waters |
| OBS captions plugin | Free | True CEA-608/708 closed captions, saved SRT option | CC toggle, works in VODs | Serious streamers who want proper captions |
| WebCaptioner + OBS overlay | Free | Open captions (burned in) | Always visible | Multi-platform streams, no installs |
For most Twitch streamers, Method 2 is the sweet spot: it’s free, it produces real toggleable closed captions, viewers on every device can use them, and the SRT export gives you subtitles for highlight videos as a bonus. Use Method 1 if you want captions in the next five minutes; graduate to Method 2 when you’re ready.
Tips for Captions Viewers Will Actually Read
- Feed the recognizer clean audio. A decent microphone, close to your mouth, with background noise suppressed, improves accuracy more than any setting. Game audio bleeding into your mic source is the number one accuracy killer, use a mic-only source.
- Speak in complete thoughts. The recognizer handles normal conversational speech well; rapid-fire callouts, heavy slang, and game-specific jargon get mangled. That’s normal, even professional captioning struggles there.
- Keep it to 3 lines. Longer caption blocks flicker or get cut off on Twitch’s player.
- Mention it on stream. A quick “captions are on, hit the CC button if you want them” in your intro helps viewers who’ve never used them.
- Check your VODs. Watch a replay with captions on to spot recurring misrecognitions (your username, your game’s terminology) and adjust how you say them.
Limitations Worth Knowing
- Console streamers (streaming directly from a PlayStation or Xbox without a capture card PC) can’t run OBS plugins, so these methods don’t apply. Your options are a capture-card PC setup or streaming through a PC at all.
- Delay: live captioning adds a small delay, usually under a second, between speech and caption. Viewers are used to this from broadcast TV; it isn’t a defect.
- Accuracy isn’t perfect. Expect solid results on clear speech in quiet conditions, noticeably lower with accents the model hasn’t heard much of, overlapping voices, or loud game audio. Review your VOD captions occasionally so you know what your audience is actually reading.
Frequently Asked Questions
Do viewers need to install anything to see my captions?
No. When you embed proper closed captions (Methods 1 and 2), Twitch’s own player shows a CC button. Viewers just click it. Only the open-caption overlay method (Method 3) shows text with no viewer action needed.
Do Twitch captions work on VODs and clips?
Yes, embedded closed captions persist in VODs, so viewers can watch replays with captions on. This is one of the strongest reasons to prefer Method 2 over an overlay.
Is the OBS captions plugin really free?
Yes. It’s an open-source community plugin. It uses Google’s speech recognition service on the backend, which is free for this kind of usage, but the plugin itself costs nothing and requires no account.
Will captions slow down my stream or PC?
Captioning adds negligible CPU load, speech recognition happens in the cloud, not on your machine. Your stream quality and game performance are unaffected.
Can I caption in a language other than English?
The plugin supports many languages with Western character sets, selectable in its settings. Accuracy varies by language, English is the most mature, but major European languages work well. Check the plugin’s language list for your specific language.
Why don’t I see the CC button on my own stream?
The CC button only appears when Twitch detects caption data in your stream. If it’s missing: confirm the plugin’s caption preview is showing text in OBS, verify you’re sending captions on the active scene (not a “starting soon” screen with no mic), and check that your mic source isn’t muted. On Android, the option only appears after you’ve spoken on stream.
Conclusion
Adding closed captions to your Twitch stream takes less than ten minutes and costs nothing: turn on OBS’s built-in captioning for instant results, install the free OBS captions plugin for proper toggleable closed captions that persist in VODs, or run a browser captioner into OBS as an overlay when you can’t install anything. Whichever you pick, tell your viewers the CC button exists, the best captions in the world help nobody if the audience doesn’t know they’re there.